Publer Review 2026: Is This Social Media Scheduler Any Good?

Welcome to my Publer review.
With over half a million users, Publer is one of the most popular social media schedulers on the market. But is it really that good?
I tried it out for myself to find out. In this in-depth Publer review, I’ll share my experience using it and give you my take on its pros and cons.
By the time you’re done reading, you’ll know everything you need to know to decide whether Publer is the right tool for you.
What is Publer?
Publer is an all-in-one social media scheduler designed to help you save time by automating your publishing schedule.
It’s incredibly feature-rich, with all the tools you need to plan, create, curate, schedule, publish, and analyze social media posts across multiple social media channels in one place.
It’s a popular choice amongst content marketers and bloggers thanks to its best-in-class content curation toolkit and WordPress integration.
Likewise, businesses and agencies appreciate its scalable pricing plans and rich team collaboration features.
We’ll talk more about Publer’s strengths (and weaknesses) later. But first, let’s look at its features…
What features does Publer offer?
Publer is one of the most feature-rich social media management tools I’ve ever tried. It’s loaded with too many features to list, but some of the highlights include:
- Social media scheduling
- Content planning
- Design integrations
- Bulk scheduling
- Content calendar
- AI Assist
- Media library
- Team collaboration
- Analytics & reports
- Workspaces
- Content recycling
- Content curation
The best way to understand how all these features work together to help you manage your social media campaigns is to try them out.
So next, I’m going to let you look over my shoulder as I explore the Publer platform and test everything it has to offer.
Workspaces
The first thing you’re prompted to do after signing up for Publer is create a Workspace.

You can have multiple workspaces within one account, each with its own connected socials and users.
This is useful for social media managers and agencies that work with multiple brands, as it allows you to keep all your clients separate from one another.
Without workspaces, you’d be managing all your clients’ accounts within the same dashboard, which is a disaster waiting to happen. You don’t want to accidentally post something to the wrong account.
Integrations
After you’ve created a workspace, the next step is to connect your socials. You’ll need to do this before you can schedule posts.
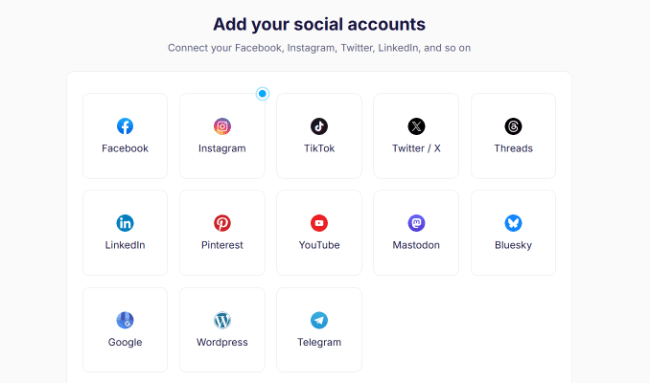
One thing I noticed here is that Publer integrates with way more social networks than most other social media schedulers.
You can connect your account (and schedule posts to) Facebook, Instagram, TikTok, Twitter (X), LinkedIn, Pinterest, YouTube, Google Business, Threads, Mastodon, Bluesky, and Telegram from one spot.
I was particularly impressed to see Mastodon, Bluesky, Threads, and Telegram on this list. Those are super niche platforms that most other schedulers don’t support yet, so it’s cool that Publer does.
Another neat thing is that Publer integrates with WordPress, too, so you can schedule posts to your socials and your blog at the same time.
Create
Once you’ve added your socials, you’ll be brought to your Home dashboard.
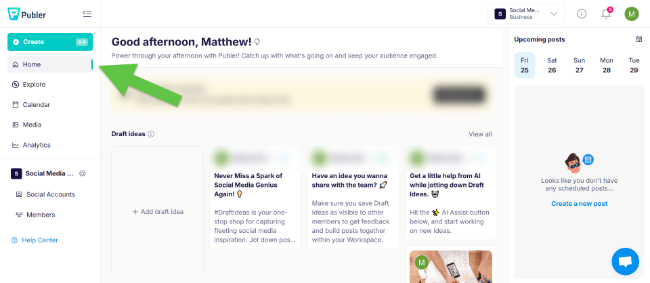
Here, you’ll see an overview of all your drafted and scheduled posts, tasks, and updates you might have missed, as well as tutorial tips to help show you how to use the platform.
You can access Publer’s various tools and features from the sidebar on the left.
To create your first post, click Create.
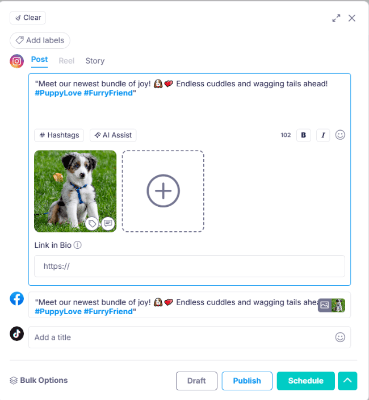
This will open up the post composer, where you’ll see a real-time Post Preview on the right and options to edit your post on the left.
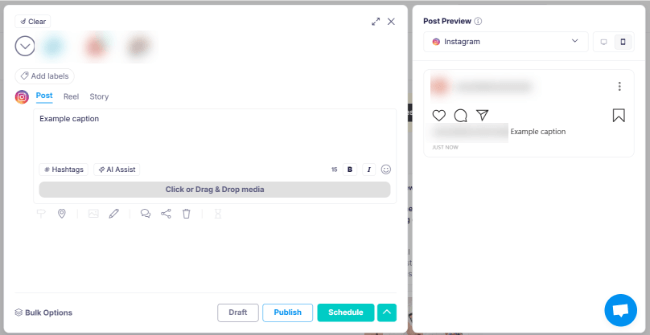
Select the social media accounts you want to share the post on at the top of the post composer. You also have the option to not select any accounts and instead save the post as a draft idea that can be used/reused at any time. You can view saved Draft ideas from your Home page.
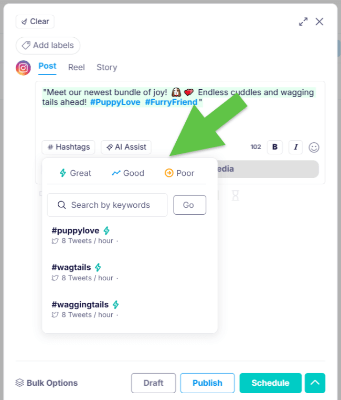
Next, enter a caption for your post, or use the AI Assist feature to generate one based on your ideas.

You can click Hashtags to get hashtag suggestions for your post, each of which is rated according to how ‘good’ they are (Poor, Good, or Great).
Plus, click the icons below the caption to add things like location tags, brand tags, and signatures to your post, and click Add labels to add internal labels to help you organize your content within Publer.
Tip: Not sure what kind of posts to create? Check out our roundup of social media post ideas for inspiration.
Design tools
If you want to add a photo or video to your post, simply drag and drop it onto the page below the caption.
Alternatively, you can create media using Publer’s design tools and integrations. To do so, click the Click or Drag & Drop media button.
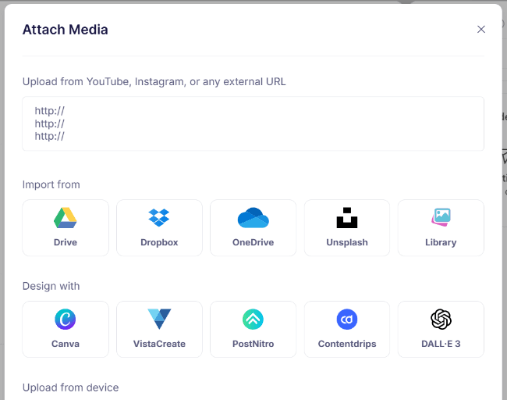
From here, you can import photos, images, GIFs, and videos from places like Unsplash and Google Drive, as well as from Publer’s built-in Media Library (which you can access through the Media tab in the sidebar).
You can also design media using tools like Canva, VistaCreate, PostNitro, Contentdrops, and DALL.E 3.
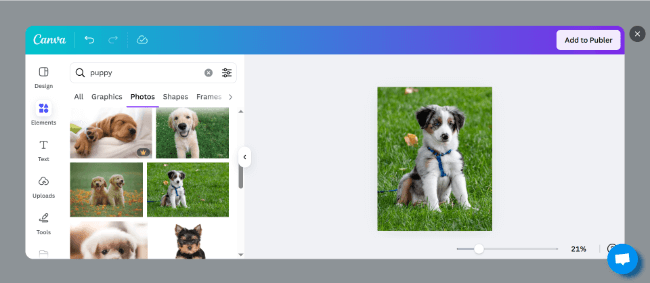
What’s cool about this is that all those third-party tools are integrated with Publer natively, so you don’t need to go back and forth between a bunch of different apps, downloading and uploading content.
Just click the tool you want to use to create your images/videos, and it’ll load up inside the app. Then, use it to make your images/videos, and add it to your post in one click. Here’s what Canva looks like inside Publer for context:
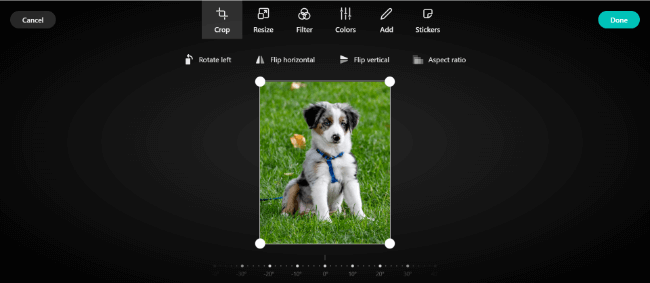
Publer also comes with its own basic media editing tools. So once you’ve uploaded or imported an image, you can click the Edit icon to crop, resize, add filters, tweak colors, add watermarks, and so on.
Cross-platform customization
If you want to post something on more than one social media platform at the same time, you can select multiple social media accounts at the top.
You’ll then have the option to create a separate caption for each network.
Plus, click the signpost icon at the bottom to fully customize the post for each account separately, including changing the image or schedule.
Bulk post creation
If you have a lot of content ready to share on social media and you want to save time, you can use the Bulk Options feature to create posts in batches.
First, click Bulk Options at the bottom of the composer.
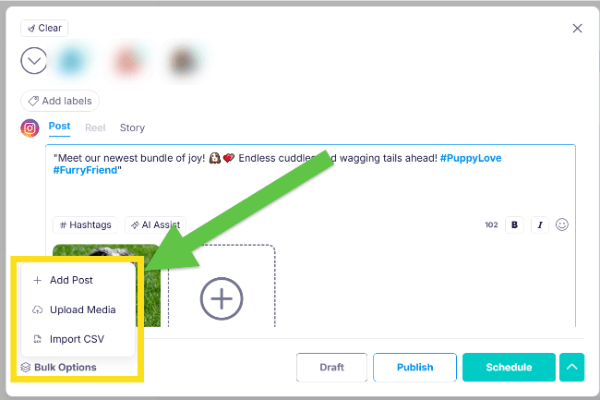
Then, either import media in bulk and add your captions in one batch, or upload a CSV file. You’ll need to follow Publer’s specifications when formatting your CSV file for it to work.
Schedule
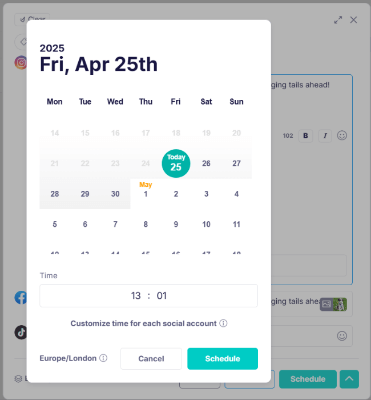
Once you’ve created a post with Publer, you can publish it right away or schedule it to be auto-published at some point in the future.
The simplest way to schedule a post is to click Schedule in the bottom right of the post composer. Then, choose a date and time manually.
Alternatively, open up the Calendar in the sidebar first, choose a date, and then create your post.
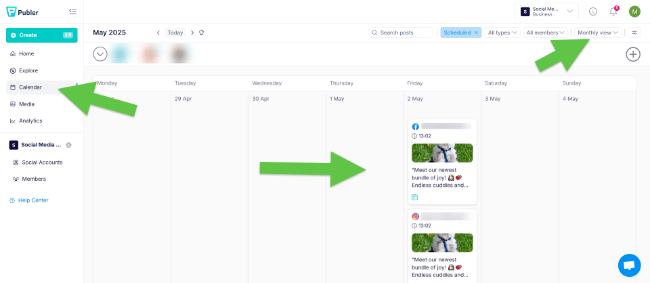
Once you’ve scheduled a post, you can view, edit, and delete it in the content calendar.
You can use the filters and search options at the top to find specific posts within the calendar. Plus, switch between four different views: Daily, Weekly, Monthly, and Feed.
Compared to other social media calendars, it’s one of the better ones on the market.
Autoschedule (posting schedules)
For more efficient post scheduling, use Publer’s AutoSchedule tool.
This is a neat time-saving feature that allows you to set up a predefined weekly posting schedule.
That way, you don’t have to choose a date and time manually every time you create a new post. You can just add it to your posting queue, and Publer will automatically share it at the next available timeslot.
To set it up, click Social Accounts in the sidebar. Then, choose an account, and open the Posting Schedule tab.

Next, click on any day of the week and choose a time to create a timeslot at that time.
You can (optionally) add a label to any timeslot, and Publer will only share posts marked with that label in that timeslot. This is a nice way to stay organized and ensure a balanced content mix.
If you don’t want to create a posting schedule manually, you can also click Autofill to let Publer make one for you based on the number of posts you want to share each week and your best times to post.
Once your posting schedule is set up, create a post and click AutoSchedule.

Then, choose whether you want to schedule that post to the top of the queue (so it’s published at the first upcoming timeslot) or after/before a specific date.
Post recycling
Publer can automatically recycle any post or content category (label) for you, so that it gets shared again at a later date.
This is super useful if you post a lot of evergreen content.
Simply click the Recycle button in the post composer after creating a post, and choose how often you want to reshare it (e.g., every 2 weeks).
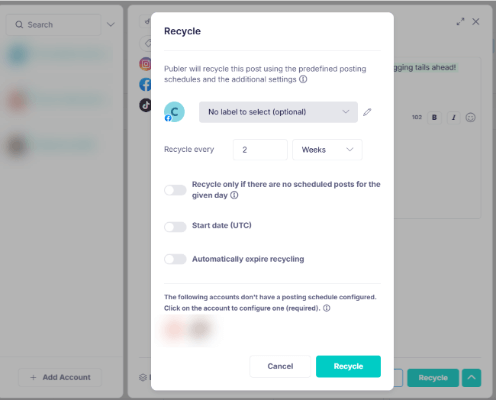
You can also set it to expire after a certain date or after being reposted a certain number of times.
You’ll notice that in addition to Recycle, there’s also a Recurring posts option.
In Publer, Recurring means scheduling a post to be published at specific times repeatedly, while Recycle refers to automatically re-posting previously published posts from a designated bucket according to your predefined posting schedule.
Follow up comment scheduling
In addition to posts, you can also schedule follow-up comments with Publer.
This is useful if, for instance, you want to post a thread-style Tweet with a chain of thoughts in the comments, or if you want to add your hashtags in the comment section on Instagram.
In the post composer, click the comments icon at the bottom. Then, add all the comments you want to post.
You also have the option of adding a delay between them to space them out. For instance, you can have Publer wait 5 minutes, an hour, a day, or a week after posting one before posting the next.
This is a good way to continuously ‘bump’ your posts up in the algorithm by reengaging with them at set intervals.
Explore
The Explore tool is one of my favorite things about Publer. You can use it to curate content from across the web to share on social media.
To get started, click Explore in the sidebar.
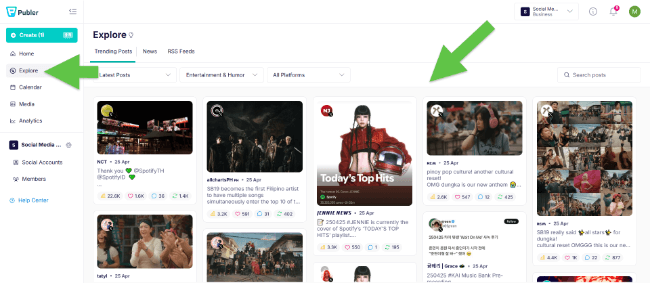
In the Trending Posts tab, you’ll see a list of trending posts pulled from Twitter and Instagram. You can filter results by category (e.g., business & entrepreneurship, lifestyle & wellness, etc.) to find content relevant to your niche. Plus, sort them by recency or performance.
You can also search for any keyword to find the best trending posts related to that keyword.
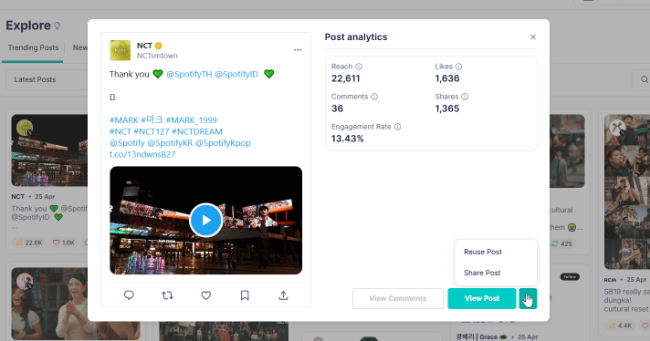
Next to each trending post, you’ll see metrics including its reach, likes, shares, comments, and engagement rates.
You can click on it to view it in the social media platform, and click Reuse or Share to publish/schedule it on your own account.
From the News tab, you can discover and share relevant news stories and articles from sources like Google News.
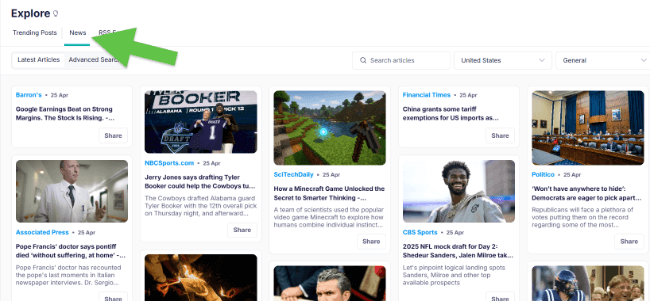
As with trending posts, you can use search and filter options to narrow down the results and find content your audience will love.
From the RSS Feeds tab, you can set up RSS feeds to automatically import content from specified websites.
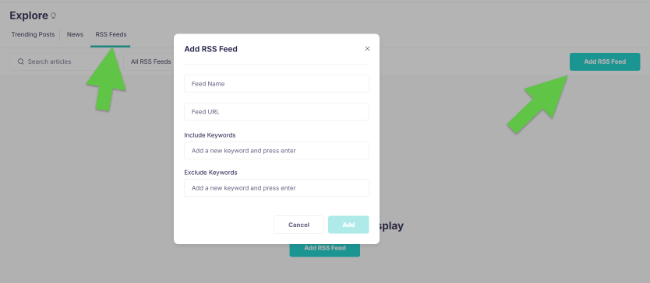
Just click Add RSS Feed and enter the URL. This comes in useful for bloggers and publishers who want to automatically share links to their latest posts on their social media profiles and pages.
One more thing: Publer also offers a browser extension so you can discover and share content as you browse the web. Just install the extension, then right-click on any text, image, or link anywhere on the web and tap Share with Publer to add it to your posting schedule.
Collaborate
Publer offers rich collaboration features for teams who work together on social media campaigns.
You can invite and add new members to your account/workspace from the Members tab.
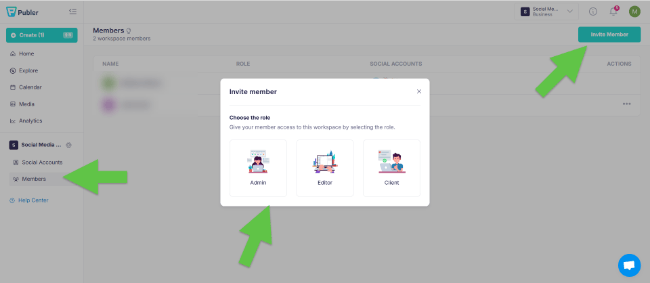
Each member can be assigned one of three roles (Admin, Editor, or Client) to determine what they can do. You also assign permission levels to each role and choose which social media account each member has access to.
The content calendar is shared, so all members added to your account can access it. You can leave internal notes within the calendar and on posts to communicate, and set up automated email alerts to let you know when someone tags/mentions you in a note.
Publer’s two-tiered approval system means you can set up robust approval workflows where editors create posts, and social media managers or clients get the final say over whether or not those posts are ready to publish.
You can even track each team member’s productivity/performance from Publer’s analytics tool, which we’ll look at next.
Analytics
Publer offers comprehensive analytics to help you track performance and gather insights to inform your social media strategy.
First, open up the Analytics tool in the sidebar.
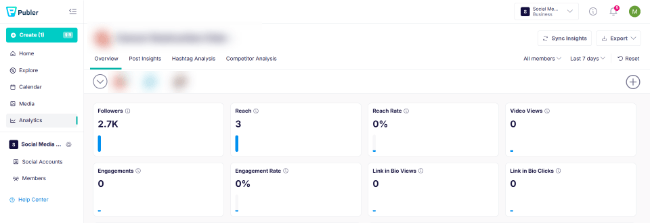
On the Overview tab, you’ll see a breakdown of key metrics like your followers, reach, engagement rate, click-through rate, etc., for each account.
Below that, graphs and charts offer insights into your audience. For instance, you can see a breakdown of your follower ages, genders, and top countries.

The Best Times to Post chart shows you your optimal posting times, based on historical data from both you and your competitors. You can use this data to guide your posting schedule.
And at the bottom, you’ll see a breakdown of the activity of all the members added to your Publer account so you can measure their productivity.
Switch over to the Post Insights or Hashtag Analysis tab for more metrics and deeper insights into the performance of all your social media posts and hashtags.
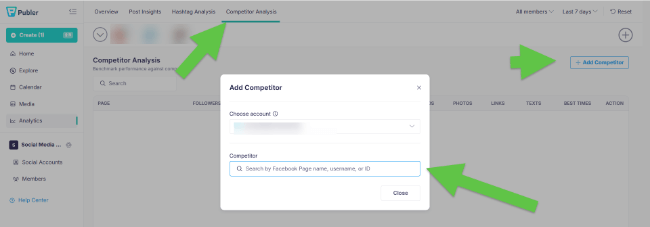
Plus, add competitors under the Competitor Analysis tab to analyze and benchmark your performance against your biggest social media rivals.
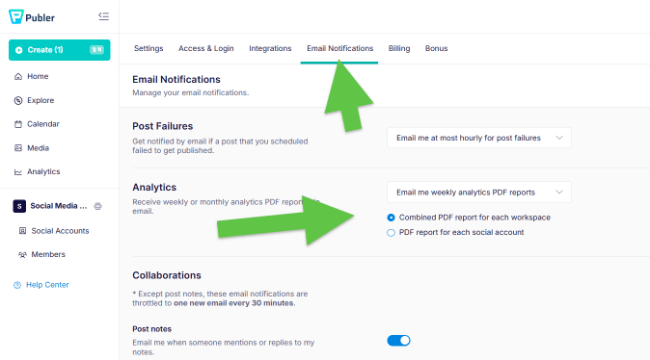
At the top of the page, click Export to export your data as a PDF or CSV report.
You can also set up automated reporting to receive regular reports straight to your inbox every week, month, etc. You’ll need to turn on email notifications through your account settings to do this.
Biolink
One final feature I want to talk about is Publer’s Link In Bio tool.
It lets you set up your own custom biolink landing page and fill it with clickable Instagram posts. This is useful if you’re using Instagram to drive traffic to promotional or affiliate links, as you can’t add links to posts natively within Instagram—you can only add a single link in your bio.
To set it up, go to Social Accounts > Link In Bio. Then, choose a username and grab your custom URL.
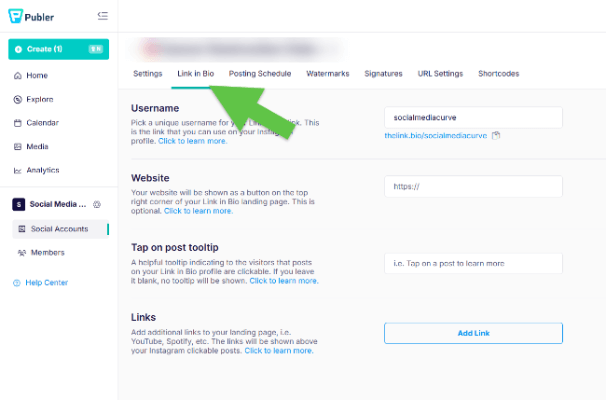
You can also manually add any additional links you want to promote to your landing page here (these will be shown above your clickable Instagram posts).
Once it’s set up, the next time you create a post in Publer, you’ll have the option to enter a link. If you do, the post will be shown on your biolink page and will be clickable.
How much does Publer cost?
Publer offers three plans: Free, Professional, and Business. Each comes with different features and benefits.
You can customize each plan by choosing how many social accounts and members you need. The more you add, the more you pay.
The Free plan is good for trying out Publer, but it’s very limited. You can only add 1 user, 1 workspace, and 3 social accounts, and you can only schedule up to 10 posts. Free users get access to the basic scheduling features but not much else.
The Professional plan starts at $5/month (prices depend on the number of accounts and members). It comes with everything Free users get, plus unlimited scheduled posts, eternal post history, unlimited workspaces, access to the Explore tool, and other important features.
The Business plan starts at $10/month and includes everything you get with the Professional plan, plus unlimited AI prompts, advanced analytics, best times to post suggestions, PDF & CSV reports, and various other advanced features.
You can get 2 months free when you sign up for annual billing. Plus, sign up for a free 7-day or 14-day trial to try out premium features before you buy.
Publer pros and cons?
After trying out everything Publer has to offer, here’s what I think its biggest pros and cons are.
Pros
- Advanced scheduling capabilities. Publer has better scheduling capabilities than most other social media schedulers, with advanced features like AutoScheduling, post recycling, and follow-up comment scheduling.
- Supports most social media platforms. I was impressed by how many social media platforms Publer works with. Most similar tools only let you schedule posts to the major social media platforms (i.e., Facebook, Instagram, Twitter, etc.), but Publer also integrates with niche platforms like Blusky and Mastodon.
- Superb content curation features. Publer’s Explore tool is one of its biggest strengths. It makes it easy to fill out your publishing schedule with curated content from social media and across the web.
- Useful Link in Bio integration. I like how Publer’s scheduler is tied to its Link in Bio tool, so you can automatically add clickable Instagram posts to your custom biolink page as you schedule them.
- Customizable pricing plans. Publer is one of the only social media schedulers that lets you choose exactly how many social accounts and user seats you want to add, and adjusts the price accordingly. The result is that you don’t end up paying for more than you need based on arbitrary plan limits, like you do with a lot of other schedulers.
Cons
- Feature-gating. Publer locks its best features behind paid plans, so its free plan is very limited. Even its Professional plan is missing important features like post recycling, best time to post suggestions, hashtag suggestions, etc., which you only get with the more expensive Business plan.
- Ease of use. Publer offers a lot of features, but the downside to that is that it makes its interface feel a little bloated and confusing. There are a bunch of different tools crammed into one dashboard, and the workspace is covered with to-do lists, tips, updates, notes… It’s enough to give you a headache. It has more of a learning curve compared to simpler social media schedulers that just offer the basics.
- It can be expensive. While its starting price is low, Publer can be expensive depending on your requirements. The price goes up the more accounts and users you add, so if you manage a lot of socials or have a large team, expect to pay a hefty monthly subscription fee.
Publer alternatives
If you don’t think Publer is the right fit, don’t worry. There are plenty of other social media schedulers out there to choose from. Here’s my top-recommended alternatives.
- Viraly – My favorite social media scheduler right now. Includes excellent publishing and content management features. Including one of the best content recycling features we’ve seen.
- SocialBee – The leading social media scheduler for evergreen content. It’s easier to use, with powerful scheduling features and a game-changing AI-powered social media strategy generator.
- Hopper HQ – Another social media scheduler with a similar feature set to Publer, including post scheduling, analytics, hashtag research, and a link in bio tool. Unlimited users on all plans makes it better value for teams.
Final thoughts
That concludes my honest Publer review. So, what’s the final verdict?
Overall, Publer is a solid social media scheduler that can help users build their social media presence.
It’s more powerful than many of its competitors, with more advanced scheduling/publishing features, more supported social media platforms, and one of the best content curation tools I’ve tried.
I found it to be more difficult to use than simpler social media scheduling tools, but that’s largely because it’s so feature-rich.
I’d recommend trying it out for yourself to see if it’s a good fit for your needs. You can sign up for a free plan or a free trial through the link below.